Rebar detailing converts a structural engineer’s design into instructions a fabricator can cut and bend and a steel fixer can build. It is the point where cover, laps, hooks and congestion stop being calculations and become a bar bending schedule someone orders steel against. This guide covers what a detailing package contains, whether your schedule is governed by BS 8666 or ACI practice, how cutting lengths are derived, why concrete cover is the single most consequential detailing decision on a Gulf coastal project, and how cut-and-bend supply changes what a BBS actually is.
- What rebar detailing is
- What a detailing package contains
- Which standard governs your schedule: BS 8666 or ACI
- Reading a bar bending schedule
- Cutting length, bend allowance and hooks
- Cover and chloride durability in Gulf conditions
- Laps, development length and mechanical couplers
- Cut and bend supply: why your BBS is a purchase order
- Congestion: joints, shear walls and pile caps
- Rebar clash detection: what to check against
- Rebar detailing in Revit
- Waste optimisation and cut list strategy
- Submitting rebar shop drawings for approval
- Eight rebar detailing mistakes
- Frequently asked questions
What Is Rebar Detailing in Construction?
Rebar detailing — also called reinforcement detailing — is the preparation of drawings and schedules that show exactly how reinforcing steel will be cut, bent, placed and tied in a concrete structure. It sits between the structural engineer’s design and the fabricator’s workshop, and it answers questions the design drawings deliberately leave open: what shape is each bar, how long is it before bending, where does it lap, how is it held at the right cover, and in what order does the cage go together.
The distinction from structural design matters. Design determines how much steel is needed and where the forces are. Detailing determines whether that steel can physically be fabricated, delivered, lifted, fixed and concreted — and whether it will still be doing its job in thirty years.
What a Rebar Detailing Package Contains
| Component | What it shows | Who uses it |
|---|---|---|
| Layout drawings | Plan and section views with bar marks, spacing, cover and extents for each element | Steel fixers, site engineers, inspectors |
| Bar bending schedule (BBS) | Tabulated list of every bar: mark, diameter, shape, dimensions, cutting length, quantity, weight | Fabricator, procurement, QS |
| Bending details | The shape of each bar mark with leg dimensions and bend geometry | Workshop |
| Standard details | Typical conditions: laps, hooks, corner bars, openings, construction joints, starter bars | Everyone — reduces repeated detailing |
| Cage and assembly drawings | How bars are assembled and tied, particularly for prefabricated cages | Off-site fabrication yard |
| Notes and references | Governing standard, concrete grade, exposure class, cover, spacer requirements, tolerances | Reviewer, inspector |
Which Standard Governs Your Schedule: BS 8666 or ACI?
This is the question most rebar detailing guides skip, and it is the first one to settle on a Gulf project — because the two traditions produce different schedules for the same structure.
The British route: BS 8666
BS 8666 is the British Standard for scheduling, dimensioning, bending and cutting of steel reinforcement. It is the reason a schedule can be sent to a fabricator as a table rather than a set of sketches: it defines a library of shape codes, each with a diagram and a formula for calculating cutting length from the leg dimensions.
Practically, that means a bar is described by a shape code plus its dimensions, and both detailer and fabricator read the same shape the same way. Straight bars have their own code, and a special or non-standard shape is scheduled under the catch-all code with a dimensioned sketch attached. Each bar carries a designation combining the steel grade and diameter.
The American route: ACI and CRSI practice
US-derived practice works differently. ACI 318 is the design code; detailing presentation is covered by ACI’s detailing guidance and manual, and the practical scheduling conventions — bar marks, standard bends, standard hooks — come largely from CRSI practice. There is no single numbered shape-code library equivalent to BS 8666; standard hooks and bends are defined by the code in terms of bend diameter and extension rather than by a catalogue of coded shapes.
Where Saudi Arabia and the UAE sit
The Saudi Building Code’s concrete provisions are ACI-derived, so design in the Kingdom generally follows ACI logic for development length, hooks and splices. At the same time, a large share of consultants and contractors in both Saudi Arabia and the UAE schedule reinforcement using BS 8666 shape codes, because that is what the regional fabrication supply chain reads fluently.
The result is a genuine hybrid: ACI-based design, BS-based scheduling, on the same project. That is workable, and extremely common. It becomes a problem only when it is unstated.
Need reinforcement detailed to the right standard the first time?
AMC Engineer produces BIM-linked rebar detailing, bar bending schedules and fabrication-ready shop drawings for projects across Saudi Arabia and the UAE — with a free LOD 200 sample from your own drawings in 24 hours.
Reading a Bar Bending Schedule
A BBS is a table, and every column earns its place. Here is what each one is doing.
| Column | What it carries | Why it matters |
|---|---|---|
| Element / location | The member the bars belong to, with grid or level reference | Lets site find the bundle without opening a drawing |
| Bar mark | Unique identifier for a bar of a specific shape and size | The link between tag, schedule and drawing. Never reuse a mark for a different shape |
| Type and size | Grade designation and diameter | Determines strength, weight and bend radius |
| Shape code | The coded bar shape, or a sketch reference for specials | What the bending machine is set from |
| Leg dimensions (A, B, C…) | Each straight length between bends | The inputs to the cutting length formula |
| Cutting length | Total length of bar required before bending | What is actually cut. Not the sum of the legs |
| Number of bars | Quantity per element and total | Procurement and delivery scheduling |
| Unit and total weight | Weight per bar and per mark, usually by diameter | Steel is bought and paid for by weight, not by count |
| Revision | Schedule revision and date | Prevents fabrication against a superseded issue |
Cutting Length, Bend Allowance and Hooks
The single most misunderstood number on a schedule. The cutting length of a bent bar is not the sum of its leg dimensions.
Leg dimensions are measured to the outside of the bend. When a bar is bent, the steel on the inside of the bend is compressed and the outside stretched, and the bar follows an arc rather than a sharp corner. The material actually consumed by the bend is less than the two legs suggest, so a deduction is applied at every bend:
Cutting length = sum of leg dimensions − total bend deductions + hook allowances
Three things drive the deduction: the bend angle, the bar diameter, and the bending pin diameter used in the workshop. Scheduling standards give the formula for each shape code, and the values are not interchangeable between standards or between editions.
Hooks and bend diameters
Standard hooks — typically at 90 or 180 degrees, with a specified extension beyond the bend — are defined by the design code, and the minimum bend diameter increases with bar diameter and depends on the steel grade. Larger bars need larger pins, and a bend tighter than the code minimum can damage the bar.
Where seismic detailing applies, hook and tie requirements are more onerous: seismic hooks, closer tie spacing and specific anchorage into confined cores. Where the design has been carried out to seismic provisions, those requirements must survive into the schedule intact.
Cover and Chloride Durability in Gulf Conditions
If there is one section of this guide that matters more than the others on a project in Jeddah, Dammam, Dubai or Abu Dhabi, it is this one. And it is the section almost no rebar detailing article covers at all.
Why cover is a durability decision, not a drafting one
Concrete cover is the distance from the concrete surface to the nearest reinforcement. It does two jobs: it transfers bond between steel and concrete, and it protects the steel chemically. Fresh concrete is highly alkaline, and that alkalinity keeps a passive oxide film on the bar that prevents corrosion. Cover is what keeps that protection intact.
The Gulf problem: chloride-induced corrosion
In coastal Gulf environments, reinforcement is exposed to chlorides from seawater, from saline groundwater and from airborne salt. Chloride ions migrate through the concrete cover over time, and once they reach the bar in sufficient concentration they break down the passive film locally — even though the concrete around it is still alkaline and looks perfectly sound.
The corrosion product occupies more volume than the steel it replaces. That expansion cracks the cover from the inside, the cracks open a faster path for more chlorides, and the process accelerates. This is the dominant durability mechanism for reinforced concrete in the region, and it is why a structure can be structurally correct, built to the drawings, and still show spalling far earlier than expected.
What the detailer actually controls
- Cover, stated and achieved. The specified cover comes from the design code and the exposure class. The achieved cover is a detailing and site matter — spacer type, spacer spacing, cage rigidity and support to the top mat all decide whether the drawing’s cover survives the pour.
- Spacers. Type, material, spacing and load capacity should be specified, not left to site. Spacers themselves need to be appropriate for the exposure, since a spacer is a path through the cover.
- Congestion at the face. Where bars crowd near the surface — corners, lapped zones, secondary reinforcement — the effective cover to the outermost bar is what governs, not the nominal figure to the main steel.
- Detailing that lets concrete flow. Cover is worthless if concrete cannot get past the cage to fill it. Bar spacing must respect maximum aggregate size and allow compaction.
Where cover alone is not the answer
For severe exposure — marine splash and tidal zones, aggressive groundwater, structures with long design lives — cover is combined with other measures decided by the designer: low-permeability concrete mixes using supplementary cementitious materials, corrosion inhibitors, coated or galvanised reinforcement, stainless reinforcement in critical zones, or cathodic protection. Each has detailing consequences, and coated bar in particular has handling, bend radius and lap implications that must reach the schedule.
Coastal project in Saudi Arabia or the UAE?
We coordinate reinforcement against structure, MEP penetrations, embeds and post-tensioning in a federated model, so cover and congestion are resolved before the cage is fabricated.
Laps, Development Length and Mechanical Couplers
Reinforcement has to be continuous to work, and bars come in finite lengths. How continuity is achieved is a detailing decision with real cost consequences.
Lap splices
The default: two bars overlap by a length sufficient to transfer force between them through the concrete. Required lap length depends on bar size and grade, concrete strength, cover, bar spacing, whether the bar is in tension or compression, and how many bars are lapped at the same section. Staggering laps is normally required precisely because lapping everything at one plane concentrates congestion and weakens the section.
Laps consume steel — a lapped bar is longer than the span it serves. On a large project the cumulative tonnage in laps is significant, and it is one of the places where detailing decisions directly move the material budget.
Mechanical couplers
A threaded or swaged connector that joins two bars end to end. Couplers cost more per connection than a lap but earn their place in three situations:
- Congestion. In heavily reinforced columns and shear wall boundary elements in high-rise construction, lapping every bar may leave no room for concrete. Couplers remove the doubled bar entirely.
- Large diameters. Lap lengths scale with bar size, so on large bars the steel saved by coupling can offset the connector cost.
- Where the design requires it. Codes classify mechanical splices by performance, with the higher classification required in specific situations including certain seismic systems. Where the design specifies a splice class, that is a design requirement, not a value-engineering opportunity.
Couplers also change the schedule: coupled bars are cut to different lengths, thread preparation adds a fabrication step, and the coupler itself becomes a procured item with its own lead time.
Cut and Bend Supply: Why Your BBS Is a Purchase Order
On most substantial projects in Saudi Arabia and the UAE, reinforcement is not cut and bent on site. It is ordered cut and bent from a mill or a dedicated cut-and-bend facility, delivered to site tagged by bar mark, and fixed straight from the bundle.
That single fact changes the status of the bar bending schedule completely.
| Cut on site | Cut and bend supplied | |
|---|---|---|
| What the BBS is | A working instruction | A purchase order |
| Cost of a schedule error | Recut from stock, hours lost | Wrong steel delivered, remake and redeliver, days lost |
| Waste | Offcuts accumulate on site | Optimised at the mill against stock lengths |
| Lead time | Effectively none once stock is on site | Order to delivery, plus the approval cycle before it |
| Site footprint | Cutting and bending yard, machinery, labour | Receiving and storage only — significant on constrained urban sites |
| What must be right | The drawing | The schedule |
Three practical consequences follow:
- Schedule accuracy carries procurement risk. An error in a cutting length is not a drafting issue; it is steel that arrives unusable.
- Bar mark tagging must match site expectations. Bundles arrive labelled by mark. If the marks on the drawing, the schedule and the tag do not correspond exactly, the fixing gang is sorting steel instead of fixing it.
- Lead time belongs in the programme. Schedule approval, order placement, fabrication and delivery all sit on the critical path for the pour. Detailing that finishes on the day the pour is planned has already missed.
Standard stock lengths available regionally also affect detailing: designing bar lengths that divide efficiently into the supplier’s stock length reduces mill-side waste, and that saving is normally reflected in what you are charged.
Congestion: Joints, Shear Walls and Pile Caps
Three zones generate a disproportionate share of rebar problems, and all three are congestion problems rather than design errors.
Beam–column joints
Beam bars from up to four directions, column bars passing through, joint ties, and anchorage requirements all meet in a small volume. The classic failures are beam bottom bars that cannot physically pass the column cage, and hooks that cannot be accommodated within the joint. This is a zone that should be drawn at large scale as a standard detail, not left to a typical section.
Shear wall boundary elements
Confined boundary zones in high-rise walls carry dense vertical steel and closely spaced ties. Laps here are frequently impossible, which is where couplers become a design decision rather than an option. Concrete placement and compaction access is the constraint to check.
Pile caps and thick transfer elements
Multiple mats, starter bars for columns above, pile projections coming up from below, and often post-tensioning as well. Bar spacing has to allow concrete to reach the bottom of a deep pour, and the sequence of fixing has to be buildable given that the cage cannot be assembled from the top down.
In all three cases, the useful test is the same: could a steel fixer physically assemble this in the order the drawing implies, and can concrete reach every part of it?
Rebar Clash Detection: What to Check Against
Modelled reinforcement can be clash-checked, but a naive check produces a useless report — because reinforcement is supposed to cross itself. Bars in a mat intersect by design.
What is worth checking is reinforcement against everything that is not reinforcement:
- Sleeves and penetrations through slabs, walls and beams
- Cast-in items — embed plates, anchor bolts, cast-in channels, lifting inserts
- Post-tensioning ducts and anchorages, which have absolute priority over ordinary reinforcement in their zone
- Structural steel connections at composite interfaces
- MEP openings and builder’s work that pass through reinforced elements
- Formwork and temporary works ties and props where they occupy the same space as the cage
Results still need engineering review rather than blanket resolution — some crossings are intended, and some genuine conflicts are resolved by shifting a penetration rather than a bar. Our guide to BIM clash detection covers the test setup and tolerance logic that keeps these reports usable.
Rebar Detailing in Revit: A Practical Workflow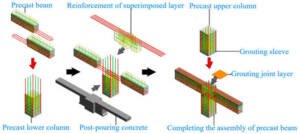
- Start from approved design data and a stable concrete model. Reinforcement placed against geometry that is still changing will be redone. Confirm the concrete model revision first.
- Set cover settings before placing anything. Cover is a host parameter in Revit, and changing it after placement moves reinforcement in ways that are tedious to verify. Define cover types per element and exposure condition at the outset.
- Use standard shapes wherever the geometry allows. Standard shapes schedule cleanly and fabricate cheaply. Reserve free-form reinforcement for genuinely non-standard geometry, since it schedules less cleanly.
- Constrain bars to the host. Properly constrained reinforcement updates when the concrete element changes rather than being left behind inside a moved member.
- Build schedules as you model. Rebar schedules and partitions should be set up early so quantity and mark errors surface during modelling, not at issue.
- Review congested zones in plan, section and 3D. A joint that reads acceptably in section can be impossible in three dimensions. Use enlarged details where normal drawing scale hides the problem.
- Check before issue. Verify marks are unique per shape, cover is as specified, laps are staggered where required, and the schedule totals reconcile with the model.
Reinforcement modelled to fabrication level is LOD 400 work — see our guide to BIM levels of development for what that entails and who normally owns it.
Waste Optimisation and Cut List Strategy
Everyone claims accurate detailing reduces waste. Few explain the mechanism. There are four.
| Technique | How it works |
|---|---|
| Nesting against stock length | Group cutting lengths so combinations divide efficiently into the supplier’s standard bar length, leaving minimal remnant |
| Rationalising bar marks | Small dimensional differences between near-identical bars create separate marks and separate offcuts. Rounding to a common dimension, where the design allows, consolidates them |
| Lap strategy | Where lap positions are a detailing choice rather than a design requirement, positioning them to suit stock lengths reduces both offcut and lapped tonnage |
| Diameter consolidation | Fewer diameters across the project means simpler procurement, fewer part-used bundles and better mill pricing — but only where the design permits substitution, which is an engineer’s decision |
Submitting Rebar Shop Drawings for Approval
Rebar shop drawings and schedules are submittals like any other, and the same rules apply: they go through a review cycle, they carry a status, and the consultant’s review is normally a check for general conformance with design intent rather than a verification of every dimension.
Three things specific to reinforcement submittals are worth planning for:
- They are on the critical path for every pour. Detailing, review, approval, fabrication and delivery all precede fixing. The submittal programme has to be built backwards from the pour dates.
- They are usually issued element by element. Foundations, then columns, then slabs, following the construction sequence — which means the review load is continuous rather than a single package.
- Revisions have physical consequences. A revision to an already-fabricated mark is remade steel. Marks released for fabrication should be tracked separately from marks still under review.
Our guide to shop drawings in construction covers the full submittal cycle, review outcomes and what an approval stamp does and does not cover.
Eight Rebar Detailing Mistakes
| Mistake | What it causes | The fix |
|---|---|---|
| Cutting length taken as the sum of legs | Every bent bar in the package is too long | Apply the bend deductions from the governing standard, for the workshop’s actual pin sizes |
| Bar mark reused for a changed shape | Wrong bars fabricated and delivered against a familiar mark | New shape, new mark. Withdraw superseded marks explicitly |
| Cover stated but not achievable | Spacers crushed or missing; achieved cover below specification | Specify spacer type and spacing; detail support to the top mat |
| Laps all at the same section | Congestion at the worst possible plane; concrete cannot be placed | Stagger laps as required; consider couplers where congestion is structural |
| Standard cited without an edition | Detailer and fabricator working to different shape rules | Name the standard and edition in the notes block |
| Congested joints detailed at typical scale | Buildability failure discovered by the steel fixer | Enlarged details for every congested joint condition |
| Schedule issued without a revision block | Fabrication against a superseded schedule | Revision and date on every schedule sheet; track released marks |
| Optimisation applied without engineer approval | An unapproved deviation embedded in fabricated steel | Every rationalisation goes back to the structural engineer first |
Frequently Asked Questions
What is rebar detailing in construction?
Rebar detailing is the preparation of drawings and schedules showing exactly how reinforcing steel will be cut, bent, placed and tied in a concrete structure. It includes layout drawings, bending details, a bar bending schedule and standard details, and it sits between the structural engineer’s design and the fabricator’s workshop.
What is the difference between rebar detailing and structural design?
Structural design determines how much reinforcement is required and where the forces are. Detailing determines whether that reinforcement can actually be fabricated, delivered, assembled and concreted — bar shapes, cutting lengths, laps, hooks, cover and buildability at congested joints.
What is a bar bending schedule?
A tabulated list of every bar in an element or project, giving the bar mark, grade and diameter, shape, leg dimensions, cutting length, quantity and weight. It is what the fabricator sets the cutting and bending machines from, and on projects using cut-and-bend supply it functions as a purchase order.
Is cutting length the same as the sum of the leg dimensions?
No. Leg dimensions are measured to the outside of the bends, and bending consumes less material than a sharp corner would. A bend deduction is applied at every bend, and hook allowances are added, so cutting length equals the sum of legs minus bend deductions plus hook allowances. The formulas are given by the governing scheduling standard and depend on bar diameter, bend angle and bending pin diameter.
Should a bar bending schedule follow BS 8666 or ACI practice?
It depends on the project specification. BS 8666 provides a coded library of bar shapes with cutting-length formulas, which is why it is widely used for scheduling across the Gulf. ACI-derived practice defines standard hooks and bends through the design code rather than a shape-code catalogue. Saudi and UAE projects frequently combine ACI-based design with BS-based scheduling, which works provided the split is stated explicitly in the drawing notes along with the edition of each document.
Why is concrete cover so important on Gulf projects?
Because chloride-induced corrosion is the dominant durability problem for reinforced concrete in coastal Gulf environments. Chlorides from seawater, saline groundwater and airborne salt migrate through the cover and break down the passive protection on the bar. The corrosion product expands, cracks the cover from within, and accelerates further ingress. Cover, and the spacers and cage support that make specified cover actually achievable, are what stand between the design life and premature spalling.
Who decides the required concrete cover?
The structural engineer, based on the exposure class, the applicable code and the project specification, informed by site investigation and chloride testing. The detailer’s job is to carry those values through accurately, state them on the drawings, and detail spacers and supports so the specified cover is achieved in the pour — not to set the values.
When should mechanical couplers be used instead of lap splices?
Where congestion makes lapping impractical, as in heavily reinforced columns and shear wall boundary elements; where bar diameters are large enough that the steel saved offsets the connector cost; and wherever the design specifies a particular mechanical splice class, which is a design requirement rather than an option. Couplers also change the schedule, since coupled bars are cut differently and thread preparation adds a fabrication step.
What does cut and bend supply change about detailing?
It turns the bar bending schedule from a working instruction into a purchase order. Steel arrives cut, bent and tagged by bar mark, so a scheduling error means unusable steel on site rather than a recut from stock. Schedule approval, order placement, fabrication and delivery all sit on the critical path ahead of the pour, and bar mark tagging must correspond exactly between drawing, schedule and delivery bundle.
Can reinforcement be clash-detected in BIM?
Yes, but a naive check is useless because reinforcement is meant to cross itself. The valuable checks are reinforcement against everything that is not reinforcement: sleeves and penetrations, embed plates, anchor bolts, cast-in channels, post-tensioning ducts and anchorages, structural steel connections, and formwork ties. Results still need engineering review, since some crossings are intended and some conflicts are better resolved by moving a penetration than a bar.
What LOD is rebar detailing?
Fabrication-level reinforcement modelling is LOD 400 work — bars modelled with the shape, size, position and data a fabricator needs. LOD 300 structural models carry concrete geometry and indicative reinforcement at best, which is not sufficient to schedule from.
How does rebar detailing reduce steel waste?
Four mechanisms: nesting cutting lengths so they divide efficiently into the supplier’s stock length, rationalising near-identical bar marks into common dimensions, positioning laps to suit stock lengths where lap location is a detailing choice, and consolidating the number of diameters used. All four change the structure to some degree, so each needs the structural engineer’s agreement before it reaches a schedule.
Conclusion
Rebar detailing looks like drafting and behaves like procurement, engineering and durability planning at the same time. A cutting length is a purchase quantity. A bar mark is a delivery instruction. A cover dimension is a decision about how long the structure lasts.
On projects in Saudi Arabia and the UAE, that last point deserves particular weight. Chloride exposure along the coast means the difference between specified cover and achieved cover is measured in years of service life, and it is decided by spacer detailing and cage support far more than by the number printed on the drawing. Detail for the cover you will actually get, schedule to the standard your fabricator reads, and get the package approved early enough that the steel arrives before the formwork does.
Let’s get your reinforcement package right before it reaches the mill.
AMC Engineer delivers BIM-linked rebar detailing, bar bending schedules and fabrication-ready shop drawings for contractors, consultants and developers across Saudi Arabia and the UAE — coordinated, scheduled and ready for submittal.